A DIY greywater system
My latest project is designed to redirect the shower water out onto the native garden that we have created in the front of the property. I had searched around for design principles and found some useful information but in general was disappointed that no-one had really provided a step-by-step instruction manual. So this is the rationale for this page - to help others solve the problems that I encountered.
The latest updates on progress and modifications are provided at the end of the page. There have been substantial modifications since I installed the system.
Materials
- 50 mm PVC pipe about 4 metres
- A two-way 50 mm diverter
- 120 litre PVC storage tank - the "pumping" tank
- 130 litre PVC rubbish bin - the "filter" tank
- Rubbish bin lid - the "disperser"
- Electric pump with float switch
- 25 mm hose pipe - about 4 x 10m segments
- 50 mm drain hole with threaded bottom and some mosquito screen
- 20-30 kgs of road metal and 40 kgs of sand
- Some muslin rag
- Various bits and pieces of wood etc - scraps
- Tools included drill, tile hole cutter, masonry drill bits, cold chisel, measuring devices etc.
System design
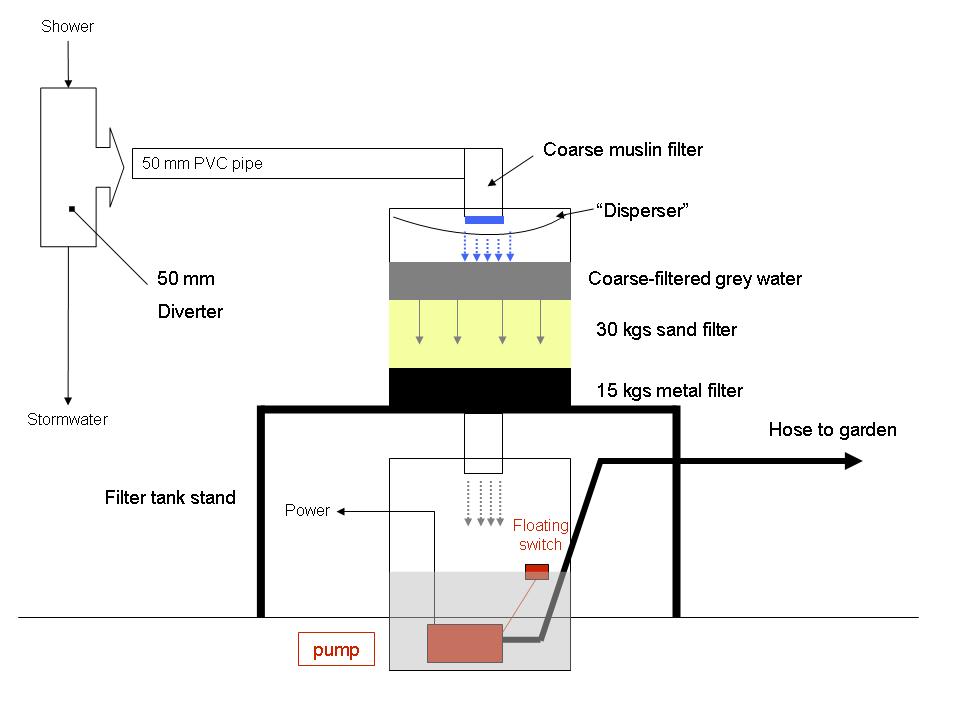
This is a sketch of the overall system design which is then described in detail.
Diverting the water
We were lucky that the shower we wanted to divert was upstairs (including the main hand basin). The pipe to the drain came down from the upstairs via the downstairs laundry - 50 mm pipe. I cut a segment out of the downtube and drilled a 55mm hole through the tiles using a tile hole cutter (about $AUD30 - in 2008 prices). Make sure you use tape over the tile to get the hole going and keep resting your drill bits to allow them to cool. You should also set the drill on slow speed with the hammer effect turned off.
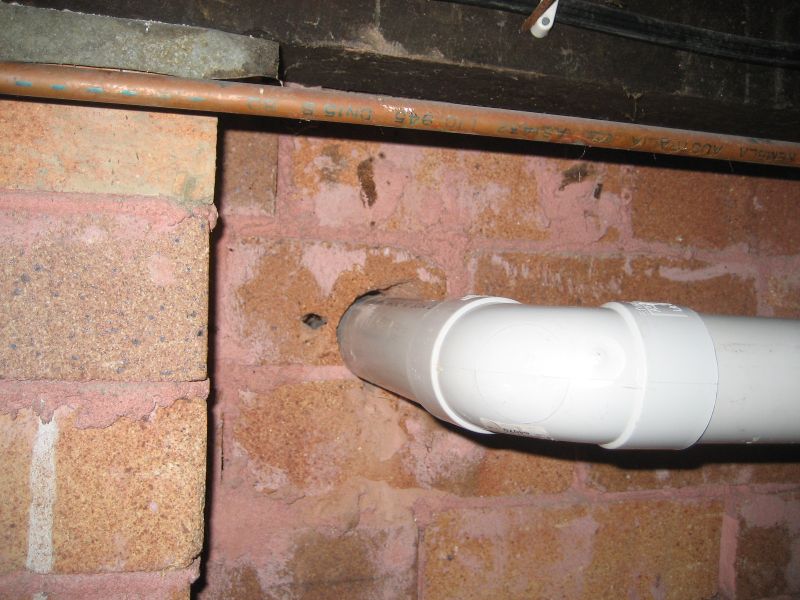
I then used a masonry drill bit (12 mm) to drill a series of holes through the bricks behind the tiles (the main wall) to allow a pipe to go through the wall and into a cellar area under the house where I planned to place the tanks and pump. I then used a cold chisel to clear out a 55mm hole through the bricks. Simple enough but not very refined - just brutal excavation!.
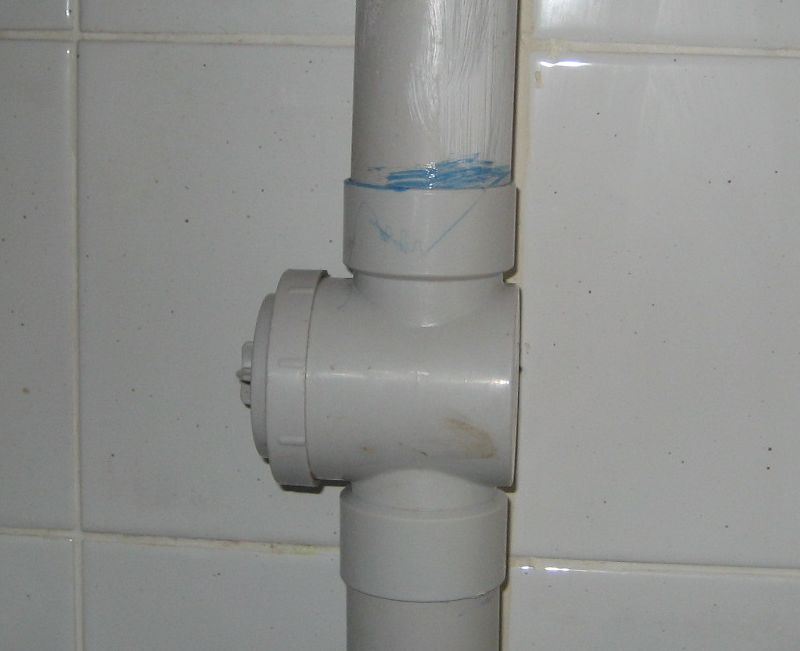
I then installed the Diverter (about $AUD29 in 2008 prices). It has a two-position switch which means I can divert the water to the pumping tank in normal times but if there is enough water in the garden (say it has been raining heavily) I can easily switch the shower water back to the drain.
Getting the water into the filter tank
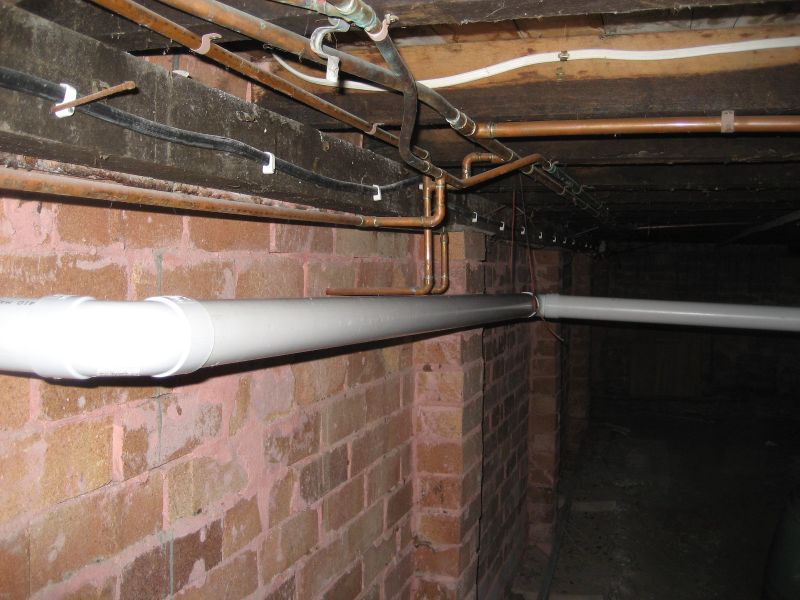
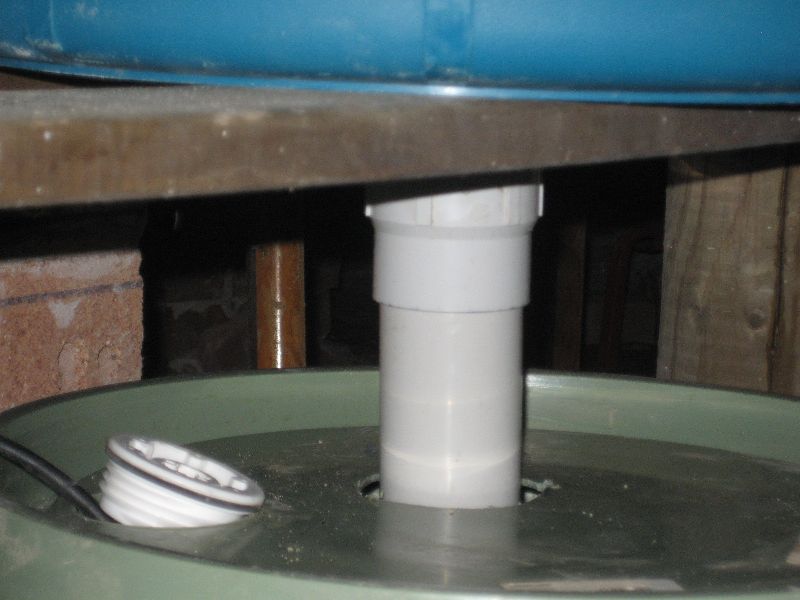
The water is diverted from the shower through a wall of the house via a 50 mm pipe from diverter which then is directed into the filter tank. Here are some photos of the plumbing:
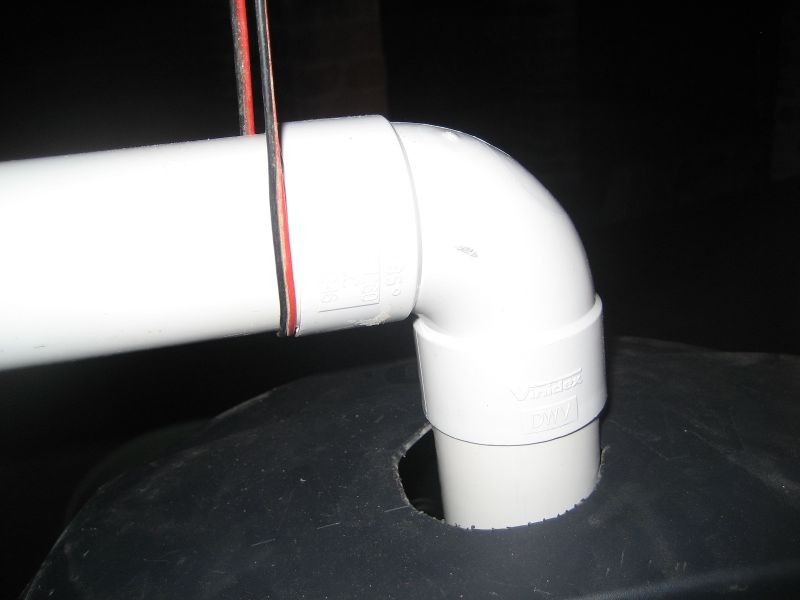
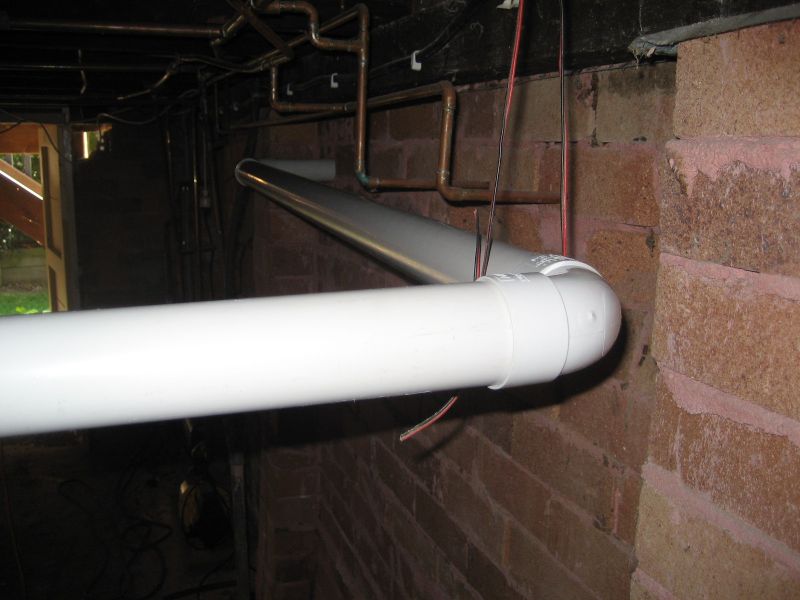
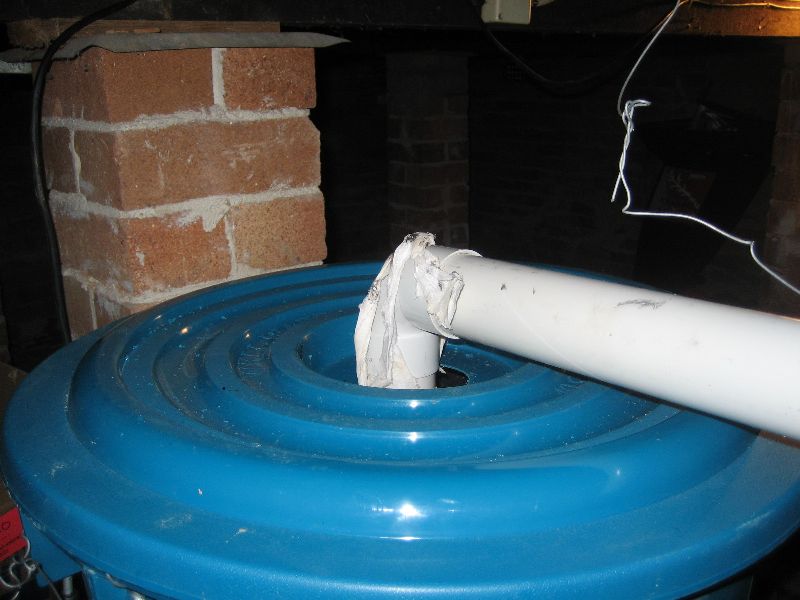
The inlet to filter tank is then covered with the muslin bag described below.
Supporting the filter tank
The filter tank is heavy - 30 kgs of sand, 20 kgs of metal and the up to around 100 litres of water - see below. Thus it needs a strong support to allow it to be stable above the main pump tank.
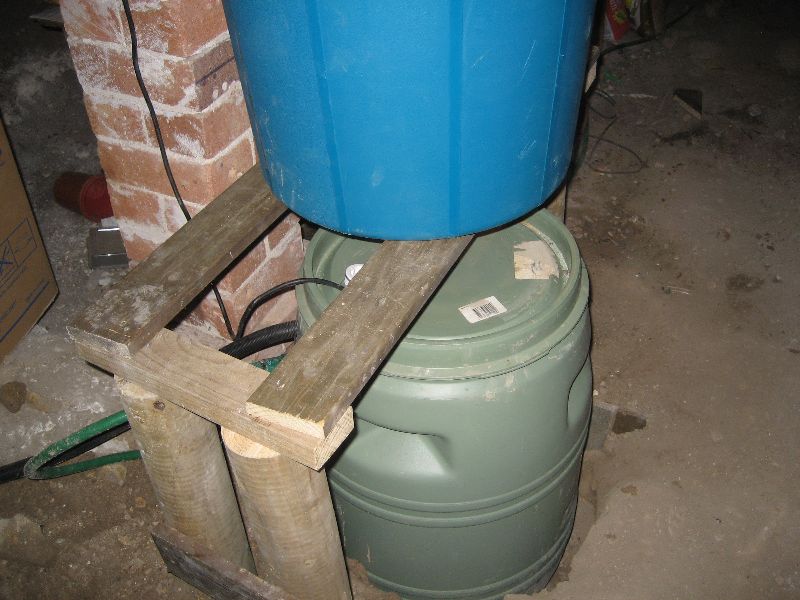
I built a filter tank stand out of scrap wood around the house. Here is another view of the filter tank stand which the main pump tank sitting below. I had to work out how far the main tank would sit below the surface to get the right fall in the pipes that connected the diverter to the filter tank. I initially tried to use some brackets attached via dyna bolts from the foundation column. The latter method was unsuitable for a number of reasons but I had to try it to find out.
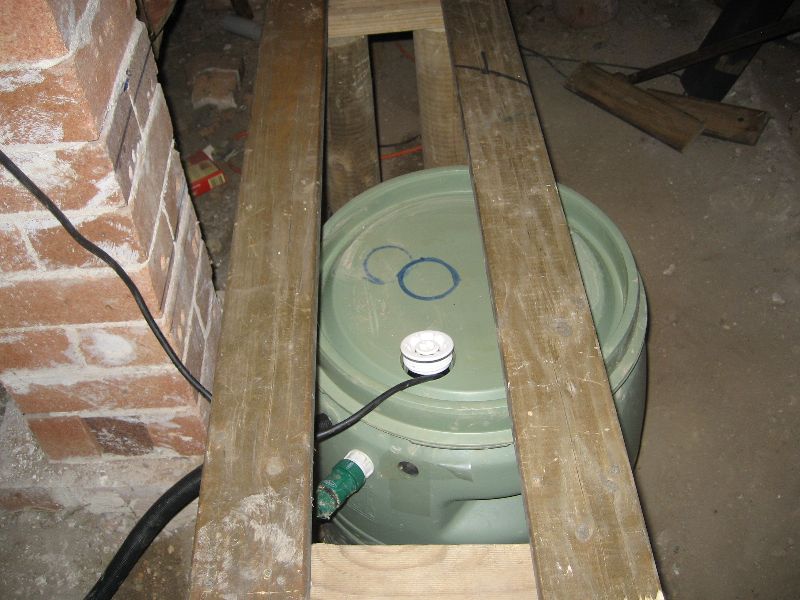
Here is a view of the main tank and pump through the filter tank stand with the lid removed from the main tank.
The filtering system
I started out buying a 60 litre rubbish bin to act as the initial inlet tank from the downpipe. I mounted it above the pump tank and put about 15kgs of metal and 30 kgs of river sand in it and connected the system I describe below up. Once the sand became wet and started to filter properly and therefore drain very slowly, the remaining capacity of the 60 litre bin was quickly exhausted - a few minutes. Some might say that is a good thing as it forces us to have short showers. We are not so convinced (the water comes from the rain tank anyway) and I didn't think it was a good idea building a system that constantly hassled us. So I redesigned the system to cope.
So, to filter the water before it goes into the pumping tank, I used a 130 litre PVC rubbish bin ($A29 at January 2009 prices). I will describe the wires etc later.
Next I installed a standard 50mm drain outlet into the bottom of the filter tank. I just cut the bottom of the bin with a saw and used lots of silicon gel on the drain plug inside the bin to seal the connection with the drain outlet. I also put a small square of mosquito net over the drain outlet (and integrated into the silicone seal) to ensure that the metal at the bottom of the bin doesn't leak through. Here is the inside view of the assembled filter tank.
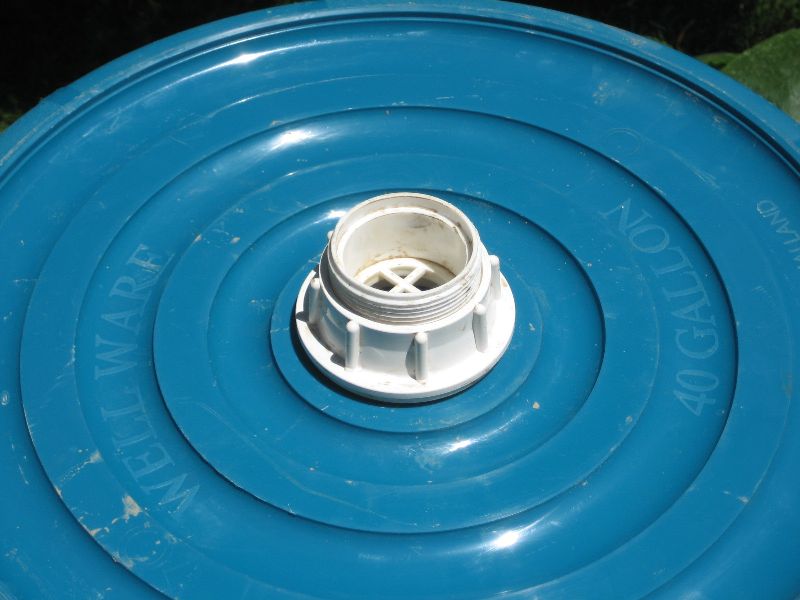
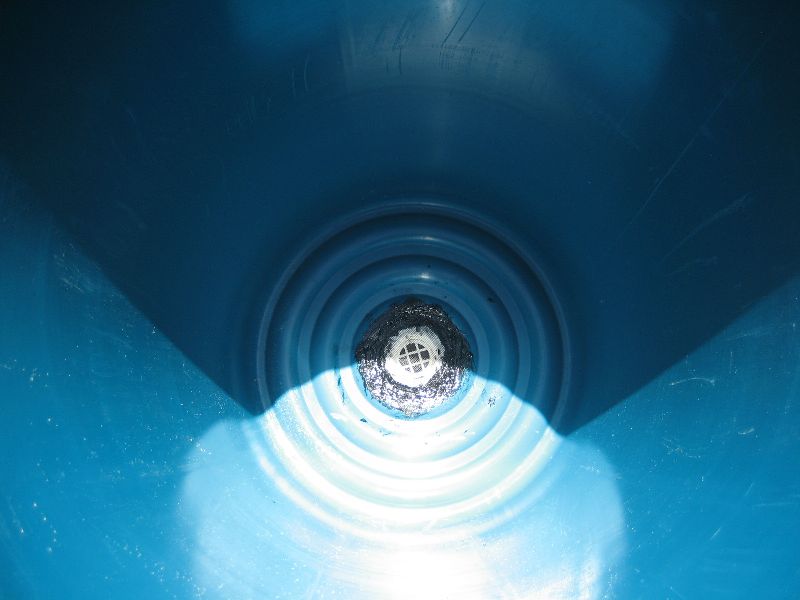
A muslin bag (sock) over the initial 50mm outlet pipe from the diverter (coming through the main wall) is the first defense (coarse) filter. The water comes through the wall and drains into the top of the filter bin through the sock, which catches all the hair and lint etc. I can report it works very well in this function but will need replacing fairly often. I am investigating more heavy duty solutions.
The fine filter comes next. The water drains through about 40kgs of sand which is on top of 15kgs of metal. This system is ideal for occasional flows of water (not continuous) and will filter most of the particles out of the stream. The ratio of sand to metal is debatable but probably the more sand the better. Further you should have a regular look at the sand to make sure it is clean. The water then flows out of the filter tank into the main pumping tank. I found this site to be the most useful in working out filtering ideas.
Be warned though: once the sand is bedded down it filters very slowly and takes many minutes after the inflow is terminated before it gets to the second tank and the pump is activated.
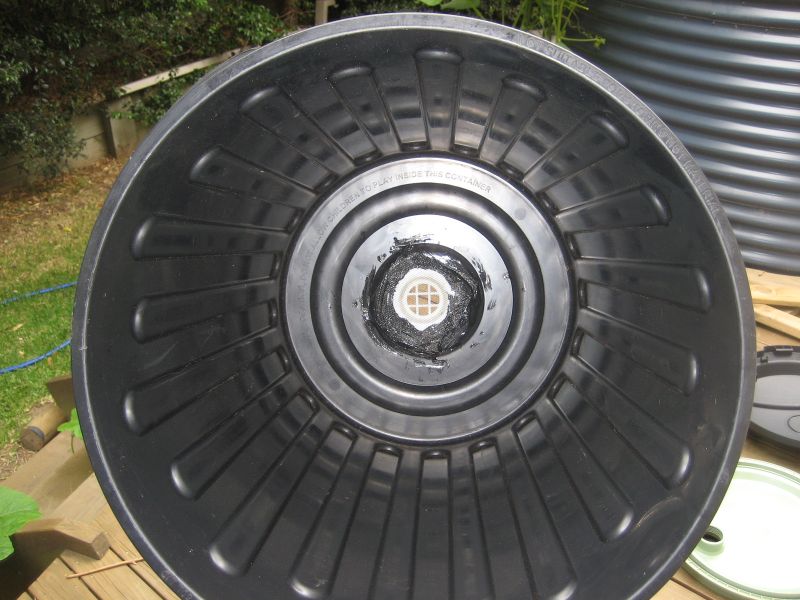
The other innovation that I introduced was a disperser which sits at the top of the filter tank. It is an upturned rubbish bin lid (from the ill-fated 60 litre bin I first tried as the filter tank) which I drilled a number of holes in. It's height from the top is determined by the wires I use to connect it to the outside sides of the bin. Its purpose is to spread the inflow over a wider area of sand to avoid the flow "drilling" a hole in the top layer of the sand. It works well in that function. This is the bottom view of the disperser and here is a view of it place at the top of the filter tank. The blue bit that is held in the centre by silicone is the cut out bit of the lid of the filter tank which provides the inlet pipe access. The black bin lid had been cut when I first thought I could get away with 60 litres capacity. So bits and pieces were reused to effect.
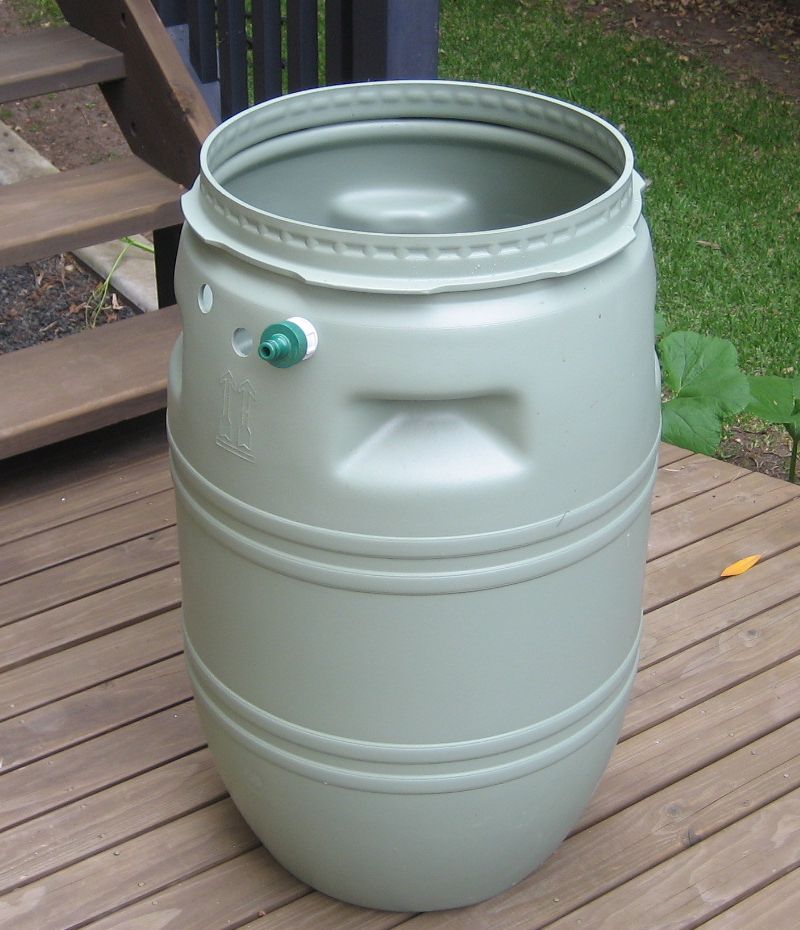
The pumping tank
The filter tank then drains into the main tank via a 50 mm PVC assembly which screw into the drain plug at the bottom of the filter tank. It can be unscrewed when I want to lift the lid of the main tank to access the pump. The main tank has two outlets: (a) the main hose to the garden; and (b) an overflow pipe (which will only ever be required if the pump fails).
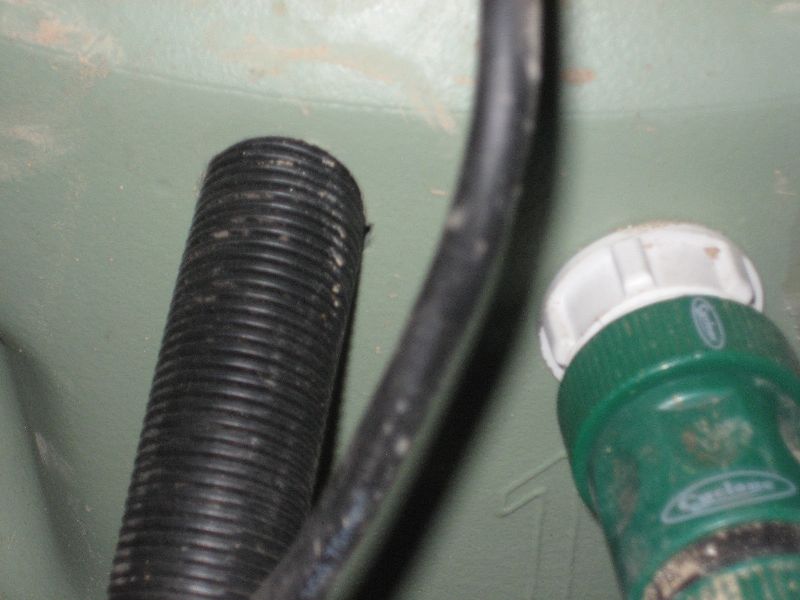
The main tank is 120 litres and was designed for another purpose but was being so heavily discounted at the hardware that I decided I could mould it to my needs. I had to cut some additional holes in the tank to fit the 25 mm discharge piping and to allow the pumps power cord to exit neatly. I also cut a hole in the top to allow the outlet pipe from the filter tank to enter the pump tank. This pipe is a connected into a screw on connector (50 mm) to the main filter drain plug as described above. It means I can easily take the lid off the pump tank and perform maintenance tasks inside it. There is only about 20 cms between the bottom of the filter tank and the top of the pump tank.
The pump that came with the tank was inadequate (it was designed to water small garden beds) and so I invested about $110 to get a high powered pump which sits in the bottom of the main tank. The pump is switched on and off by a floating switch which has to be adjusted to ensure inflow and outflow are matched. The pump's specifications are: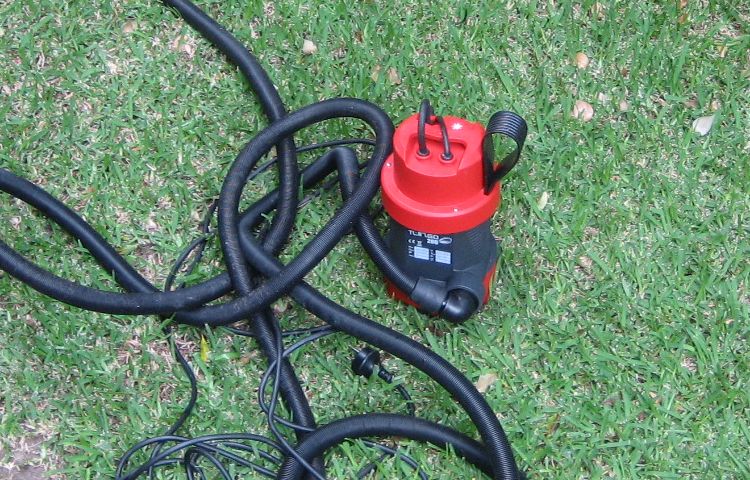
- Rated power: 220
- Maximum delivery: 110 litres/minute
- Maximum head: 4m
- Maximum particle size: 10-30mm
- Outlet: 11/4in
- Maximum immersion depth: 10m
- Maximum water temperature: 35C
- Weight: 3.8 kgs
The water is pumped out to the garden each time the shower is used so very little sits in the tank for storage. The principle is to get rid of the flow each time it arises. A small amount of water has to sit in the bottom of the main tank given the minimum requirements of the pump.
The connected system
Here is a longer view of the complete system.
Here is a view of the Two tanks.
Outlet to garden
So far I have just connected a 25mm hose to the pump in several 10 metre sections and taken it out to the garden via a hole I drilled in the side of the house. I have been directing the hose (in varying segment lengths) at different trees and parts of the native garden in the front of our property. I will experiment with drip hosing next now that the filter and pumping system is functioning well. I will report back later on my experiments in this regard.
Operation
So far the system has passed its trial run. The sand filter is very slow which is good.
- There are some issues about the robustness of the muslin filter. I plan to change that soon by laying out the muslin over the disperser.
- The disperser works well but I have lowered it by about 5 cms into the filter tank.
- You have to keep the lid on the filter tank otherwise splashing occurs.
- I am keeping my eyes on trees and plants in the garden for sensitivity to the water.
Update 1 - 3 weeks into usage - Mark II system
Not long after I started using the system I noticed the sand filter becoming much slower and a significant volume of water never seemed to drain through to the pump tank. This of-course would ultimately cause a big problem if there was too much water sitting in the top tank (mosquitos, possible health issues, odour).
I decided (after further research and reflection) that as long as the coarse filter was operating to stop hair and lint entering the pump then there was little need to worry about the sand filtering anyway, given that the water was not going on any food crops. So I emptied the filter bin of sand and gravel. The system then worked fine.
In recent days, I have refined the coarse filter. I basically put a 50 mm to 100 mm converter on the main inlet pipe (under the lid of the top bin) and then connected a 100 mm drain with some added fine mesh into the botttom of the 100 mm converter (it looks like a bell chamber). This catches all the hair etc and allows the rest through. The system works very well now.
Update 2 - March 3, 2009 - Mark III system
The system has been in use for about 8 weeks now and the area that the pumped water is going to is benefitting clearly. This is especially evident in the response of the native grasses and a prone Grevillea that was in need of water.
However, if anyone is planning to use this design you should be made aware that the filtering system has to be cleaned around once a week depending on use. The lint and hair and other gunk that seems to find its way down into the top filter tank from the shower (some of this is from bits of congealed grease from the pipes) means that the filters (upper and lower) get blocked fairly quickly. Failure to clean them regularly will see the filter tank drain so slowly (if at all) that overflow is inevitable.
Fortunately, the design means that you can easily lift the upper bin free of the lower tank and hose it out thoroughly (I do this near the compost heap). It takes me about 10 minutes maximum to dismantle the upper tank, hose and scrub it, clean the filters and reinstall. So not quite a maintenance free system but not too onerous.
Update 3 - March 15, 2009 - Mark IV systemWell, invention doesn't always go as planned. The previous modification was an improvement but required weekly cleaning of the filter which as it stood did not seem to be too onerous. However, I soon discovered that if the shower was used more often (for example, more trips to the surf or whatever) then the amount of glug that was retained by the mesh at both ends of the upper tank multiplied and I found that after 4 days overflow was a real threat. I didn't want to be checking the system daily so I had to come up with an alternative filtering system.
What I have done is returned to the disperser idea which was in the Mark I version.
- First, I cleared the mesh filter at the bottom of the filter tank. What remains is a straightforward drainage plug connected to 50 mm pipe at the bottom which then goes into the bottom pumping tank.
- Second, I abandoned the mesh filter at the top of the filter tank which was connected to a 50 mm pipe that came from the diverter. That kept getting blocked.
- Third, I reinstated the top of the filter tank (seen here with the top lid off) and laid fly screen mesh (which was the same material I had used in the bottom drain hole) all the way over the top of the disperser. I also took that blue little centre plug out to give much freer drainage into the main body of the filter tank. So now water comes straight into the upper tank from the diverter and hits the disperser at the top of this tank (under a sealed lid) and the mesh filters all the solids, hair, lint and other gunk that I don't want to go into the punp.
So far after more than a week of operation the system now functions very well. The hair etc accumulates but the mesh area is now so broad that the water can easily get away. I will have to clean the mesh once a month by the look of it without loss of overall function. So if you are planning on using this DIY this is the best version of the system I have created so far.